This guide assumes that you have already set up the Make.com integration and that the connection between Make.com and DialogShift is in place.
Example scenario
In this guide we will build the following use case:3 days after departure of a guest, their booking number should be sent to Make.com — for example to insert it into a spreadsheet.
Step 1 — Create the scenario in Make.com
1
Create a new scenario
Create a new scenario in Make.com or open an existing one.
2
Add the DialogShift module
Click + in the scenario. Search for DialogShift in the popup and select the app.
3
Pick the trigger action
Choose the trigger action Watch external flow action.
4
Create a webhook
In the popup you can pick an existing webhook or create a new one with Create a webhook. We will create a new one.
5
Name the webhook and the trigger
Give the webhook and trigger a name — in our example 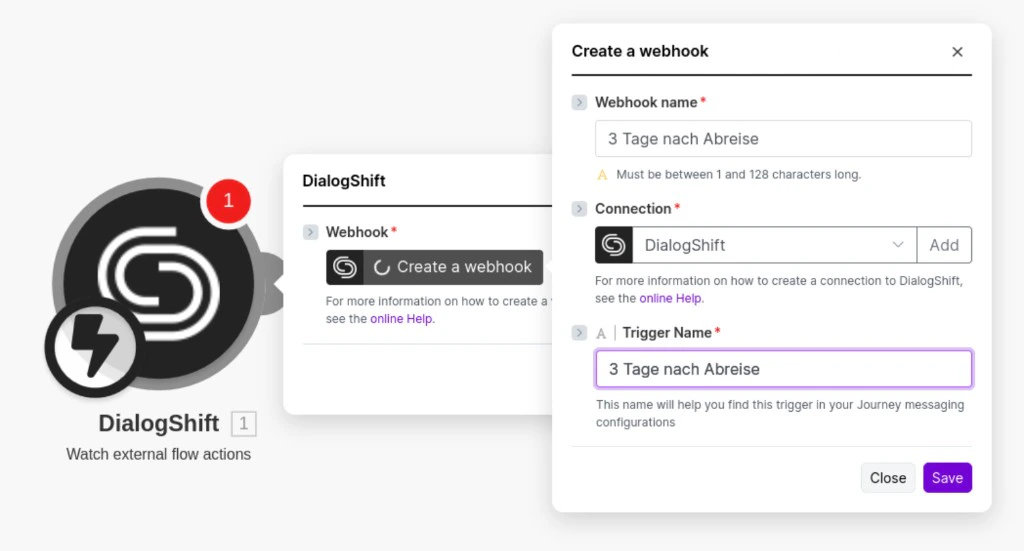
3 days after departure. We recommend identical names to begin with. If you prefer, you can pick a different display name in Make.com (Webhook Name) than the one shown in DialogShift (Trigger Name).Step 2 — Connect the flow inside Journey Messaging
Back in DialogShift you will find the webhook you just created in the Journey Messaging settings under ScenarioTrigger — the3 days after departure trigger.
1
Edit or create a flow
Your flow needs a trigger. For our example we use the Departure event with a 3 day delay.
2
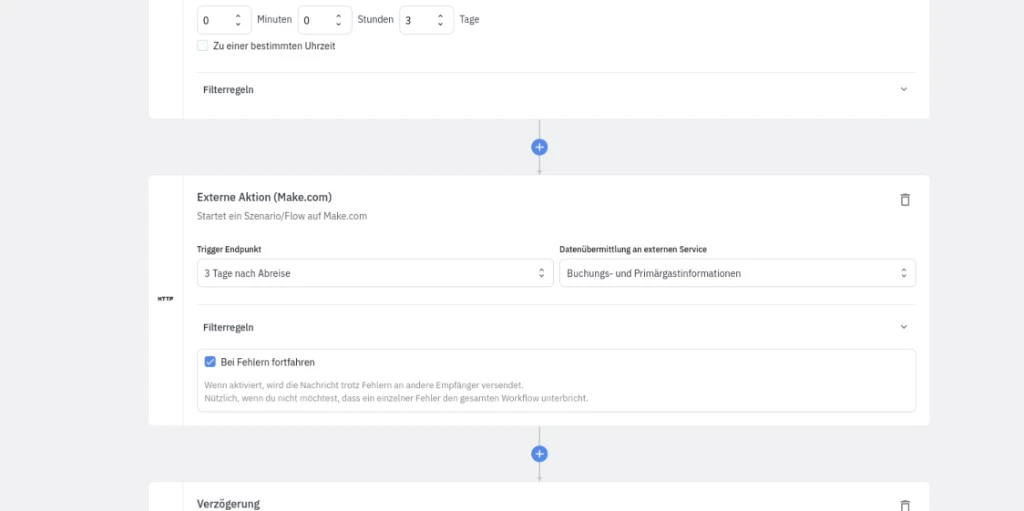
Add an external action
Add a new action and pick External action (Make.com).
3
Pick the endpoint
For Trigger endpoint choose the ScenarioTrigger you just created — in our example
3 days after departure.4
Configure the data
Choose which data to send to Make.com:
- Booking data only
- Primary guest data only
- Both
5
Save and activate the flow
Save the flow and don’t forget to activate it. From now on the Make scenario will start for every guest 3 days after their departure.
3 days after departure event together with the configured data to Make.com — and the scenario over there starts running.
Troubleshooting
Which data ends up at Make.com?
Which data ends up at Make.com?
Depending on how you configure the External action (Make.com) in the flow:
- Booking data
- Primary guest data
- or both
The scenario does not get triggered
The scenario does not get triggered
Checklist:
- Is the flow activated in Journey Messaging?
- Is the API key in the JM settings still valid?
- Does the selected trigger endpoint match the webhook in your Make scenario?
- Is the Make scenario itself switched to active inside Make.com?