> ## Documentation Index
> Fetch the complete documentation index at: https://docs.dialogshift.com/llms.txt
> Use this file to discover all available pages before exploring further.
# Journey Messaging: Getting Started
> Configuration and first steps with DialogShift Journey Messaging
## Configuration
1. Activate Journey Messaging with the DialogShift Customer Success Team ([support@dialogshift.com](mailto:support@dialogshift.com))
2. Navigate to Settings >> Journey Messaging
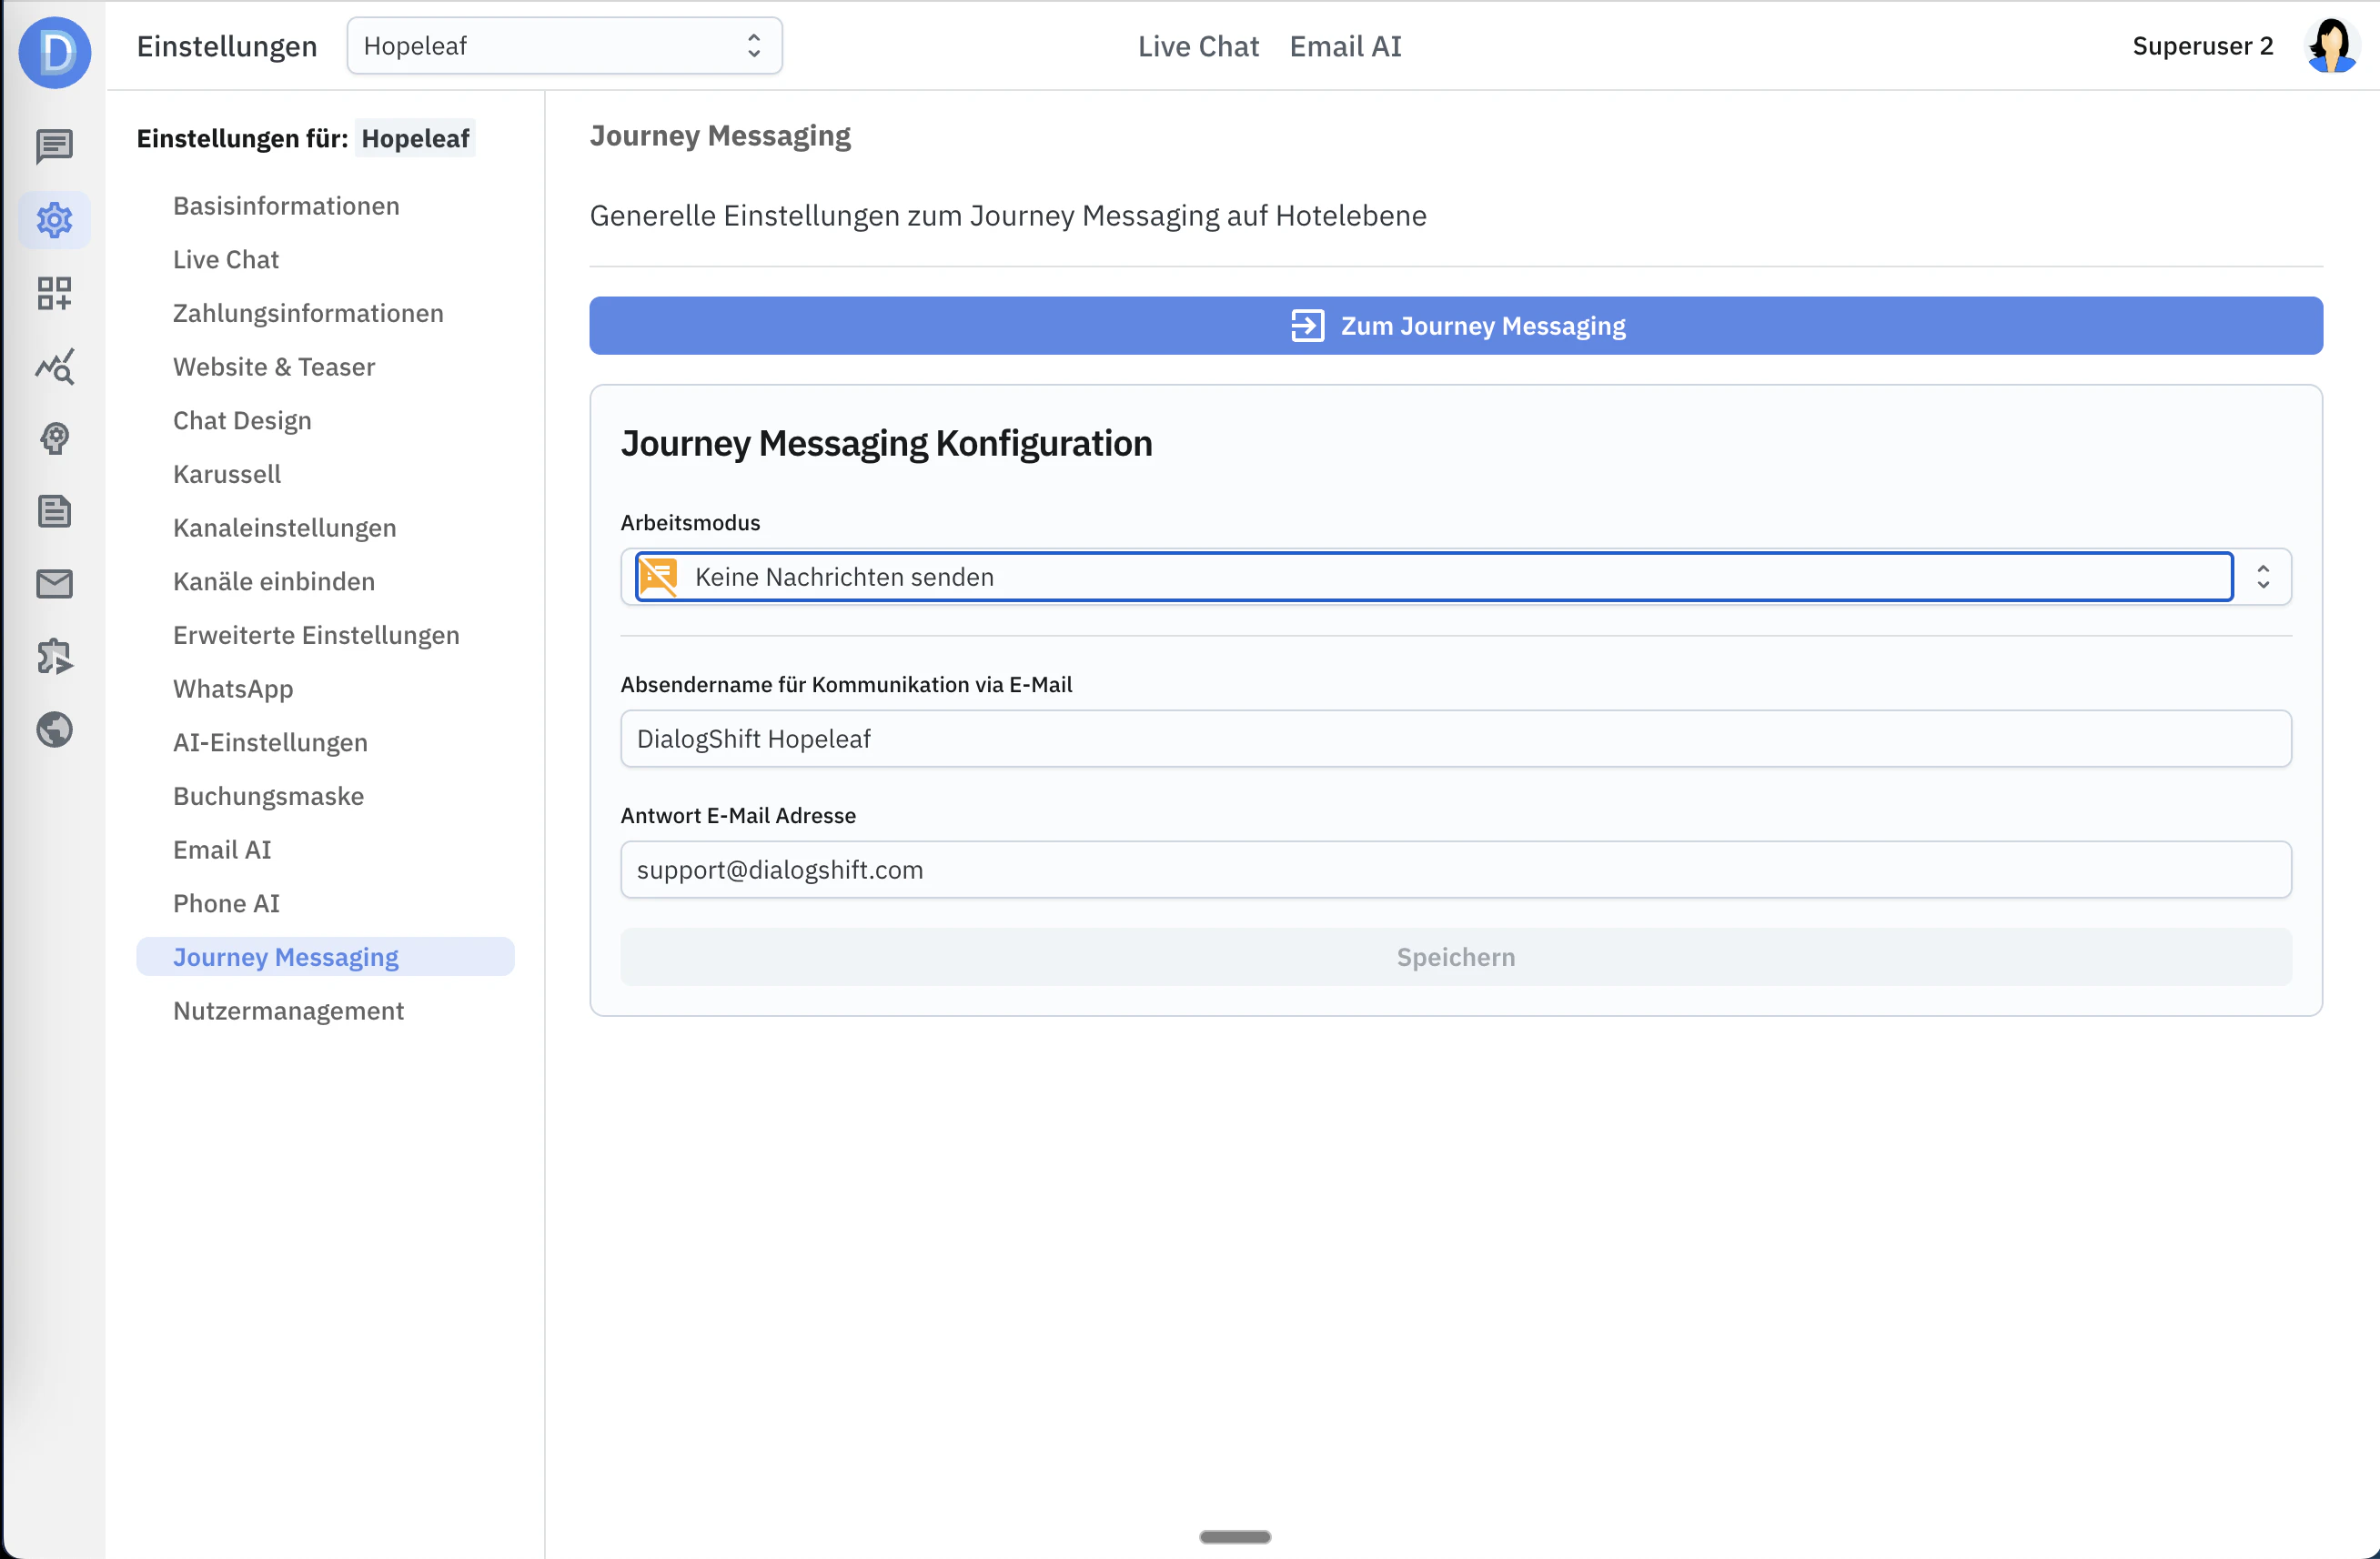 ### Working Mode
The working mode has three settings:
* **Active** - This is the setting for later operation. All messages are sent to guests.
* **Redirect messages** - You can now enter your own email address. All messages that would normally be sent to guests are now redirected to this entered email address. You can see in a mailbox what the messages would look like.
* **Send no messages** - No messages are sent. This is the off switch.
### Sender Name
This should contain the clear text sender name of the hotel. The sender address is always noreply\@dialogshift.
### Reply Address
The hotel's email address should be entered here. If the guest clicks "Reply" in their email program, it will be sent to this address.
## Getting Started
Navigate to Journey Messaging >> Message Templates
Create your first template by choosing a blank template or selecting one of the DialogShift design templates.
**A template corresponds to the message on a topic, for example a booking confirmation, a check-in request, or sending the door opening link.**
When creating, you choose a first variant for a channel and a first language. Don't worry, you can create more variants afterwards.
Create more templates by duplicating your first template and thus copying your design from one template to the next.
When you're done with the first variant, you can create additional language variants. It's recommended to first cover all other languages of your hotel.
Click on the "Duplicate variant" icon.
### Working Mode
The working mode has three settings:
* **Active** - This is the setting for later operation. All messages are sent to guests.
* **Redirect messages** - You can now enter your own email address. All messages that would normally be sent to guests are now redirected to this entered email address. You can see in a mailbox what the messages would look like.
* **Send no messages** - No messages are sent. This is the off switch.
### Sender Name
This should contain the clear text sender name of the hotel. The sender address is always noreply\@dialogshift.
### Reply Address
The hotel's email address should be entered here. If the guest clicks "Reply" in their email program, it will be sent to this address.
## Getting Started
Navigate to Journey Messaging >> Message Templates
Create your first template by choosing a blank template or selecting one of the DialogShift design templates.
**A template corresponds to the message on a topic, for example a booking confirmation, a check-in request, or sending the door opening link.**
When creating, you choose a first variant for a channel and a first language. Don't worry, you can create more variants afterwards.
Create more templates by duplicating your first template and thus copying your design from one template to the next.
When you're done with the first variant, you can create additional language variants. It's recommended to first cover all other languages of your hotel.
Click on the "Duplicate variant" icon.
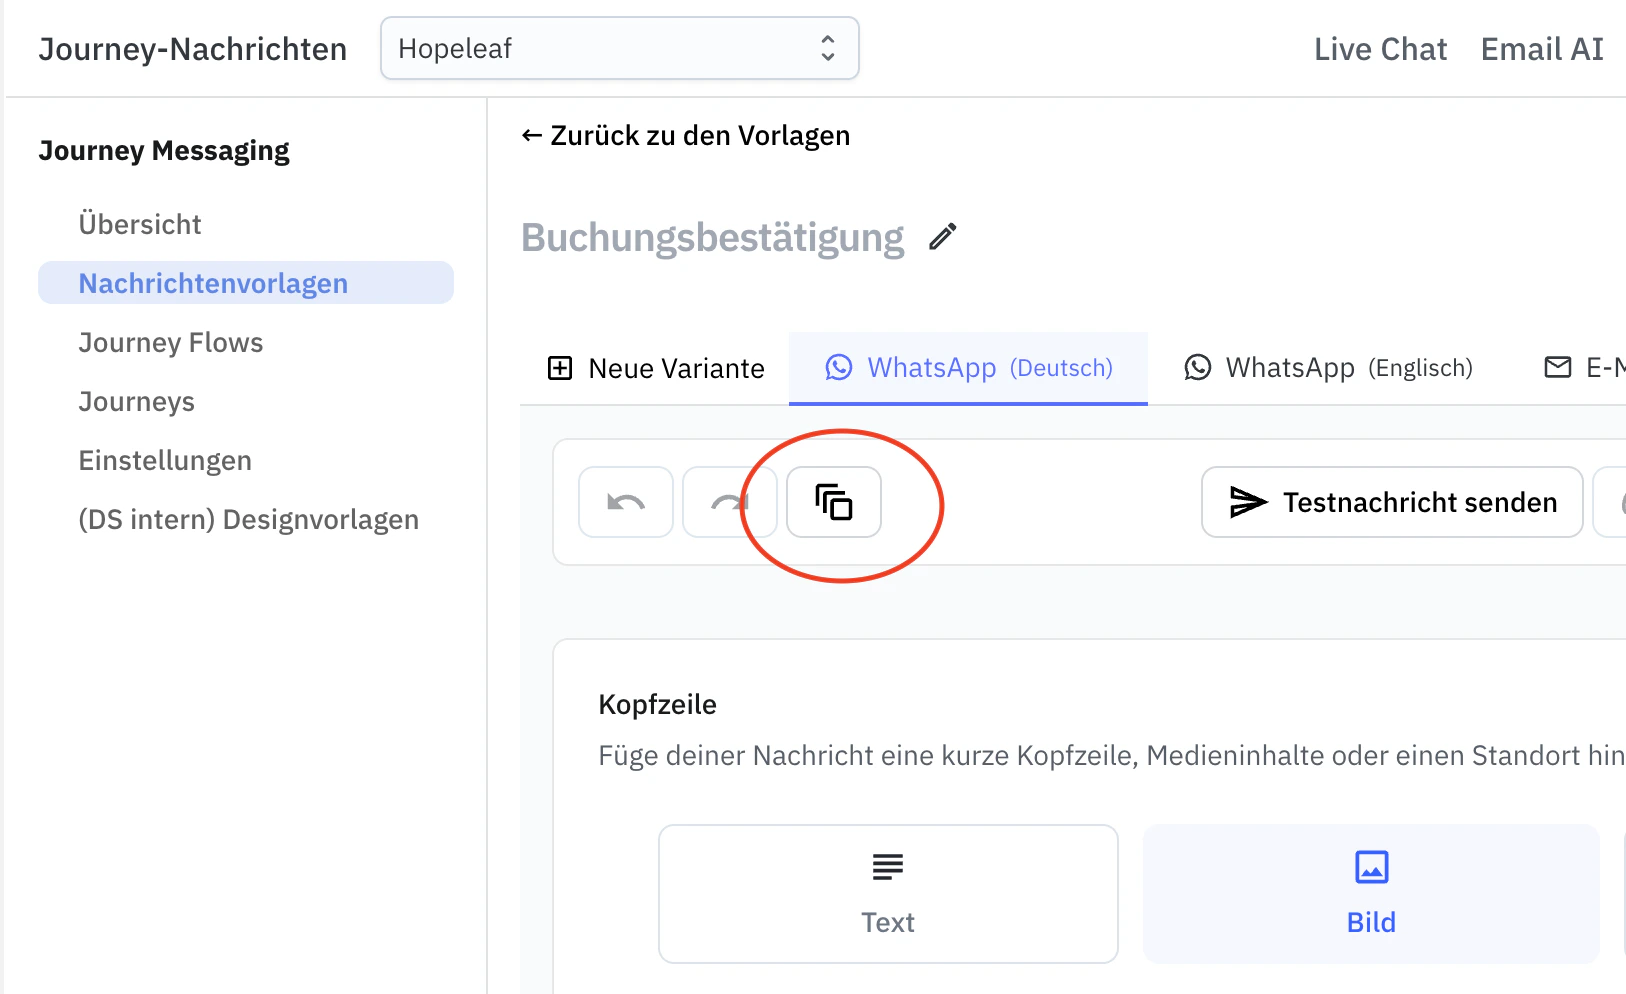 If you want to reach your guests on more than one channel, you should now create more variants for other channels. Channels are email, WhatsApp and SMS.
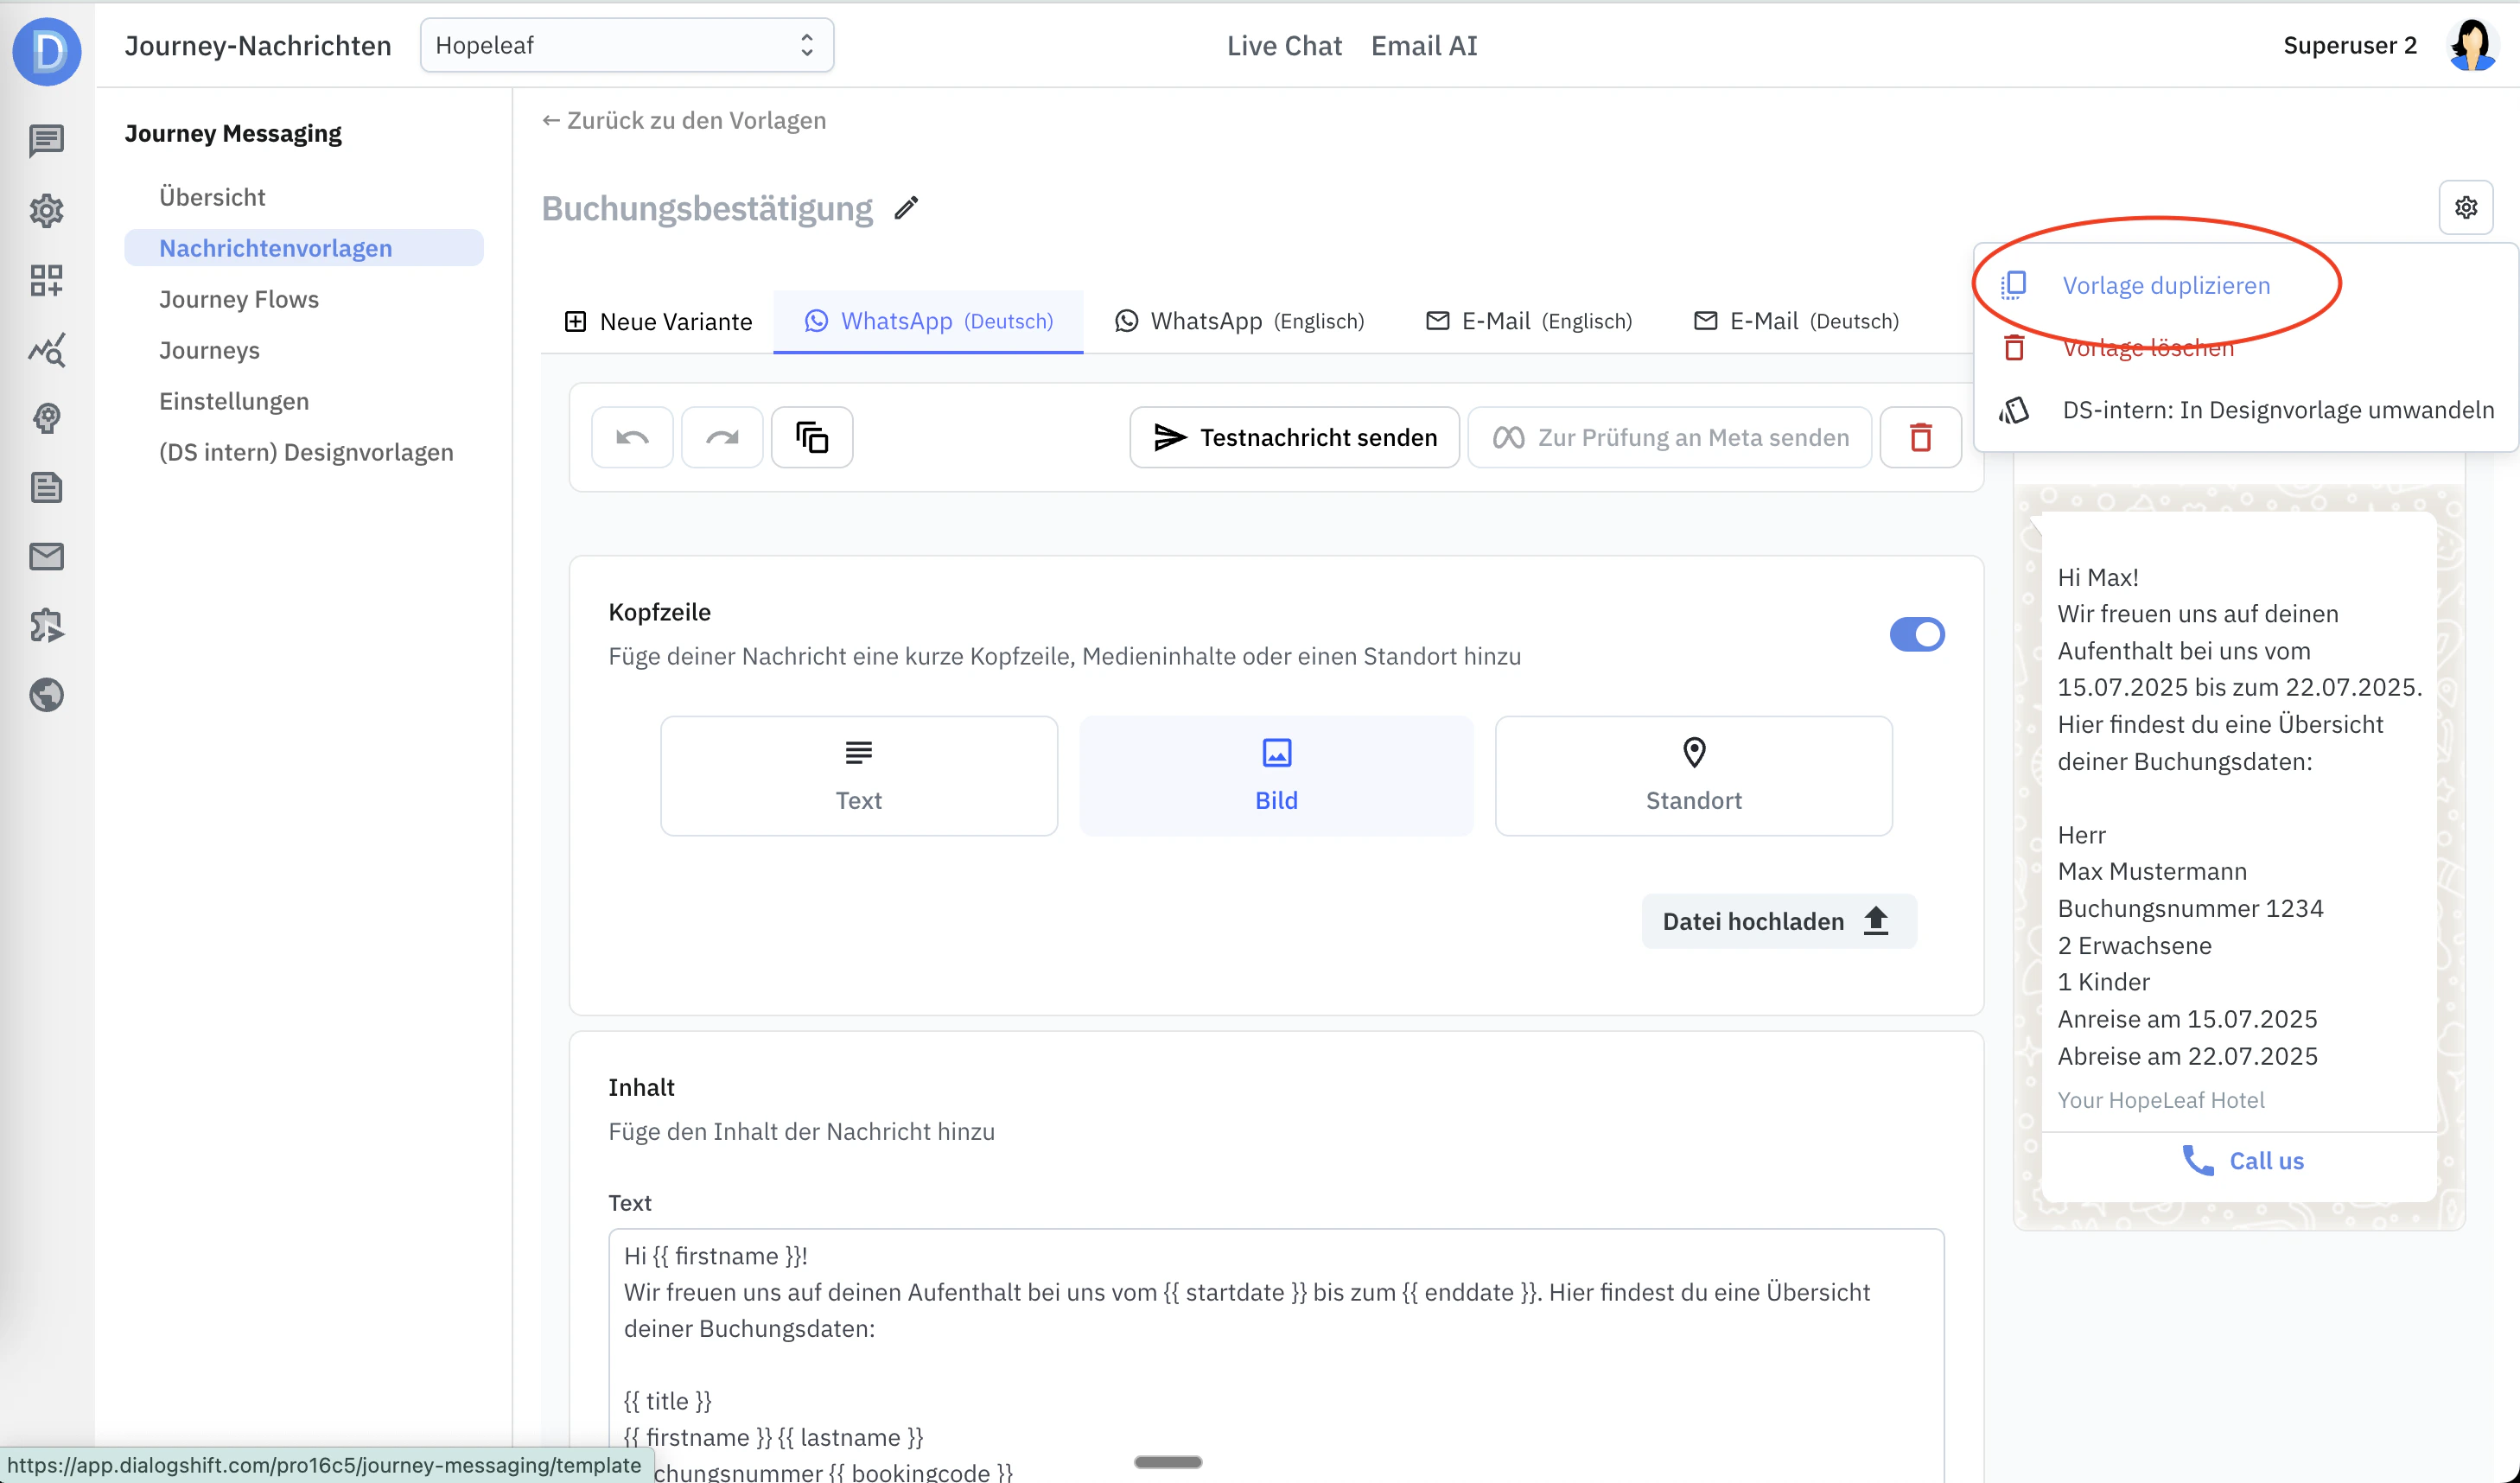
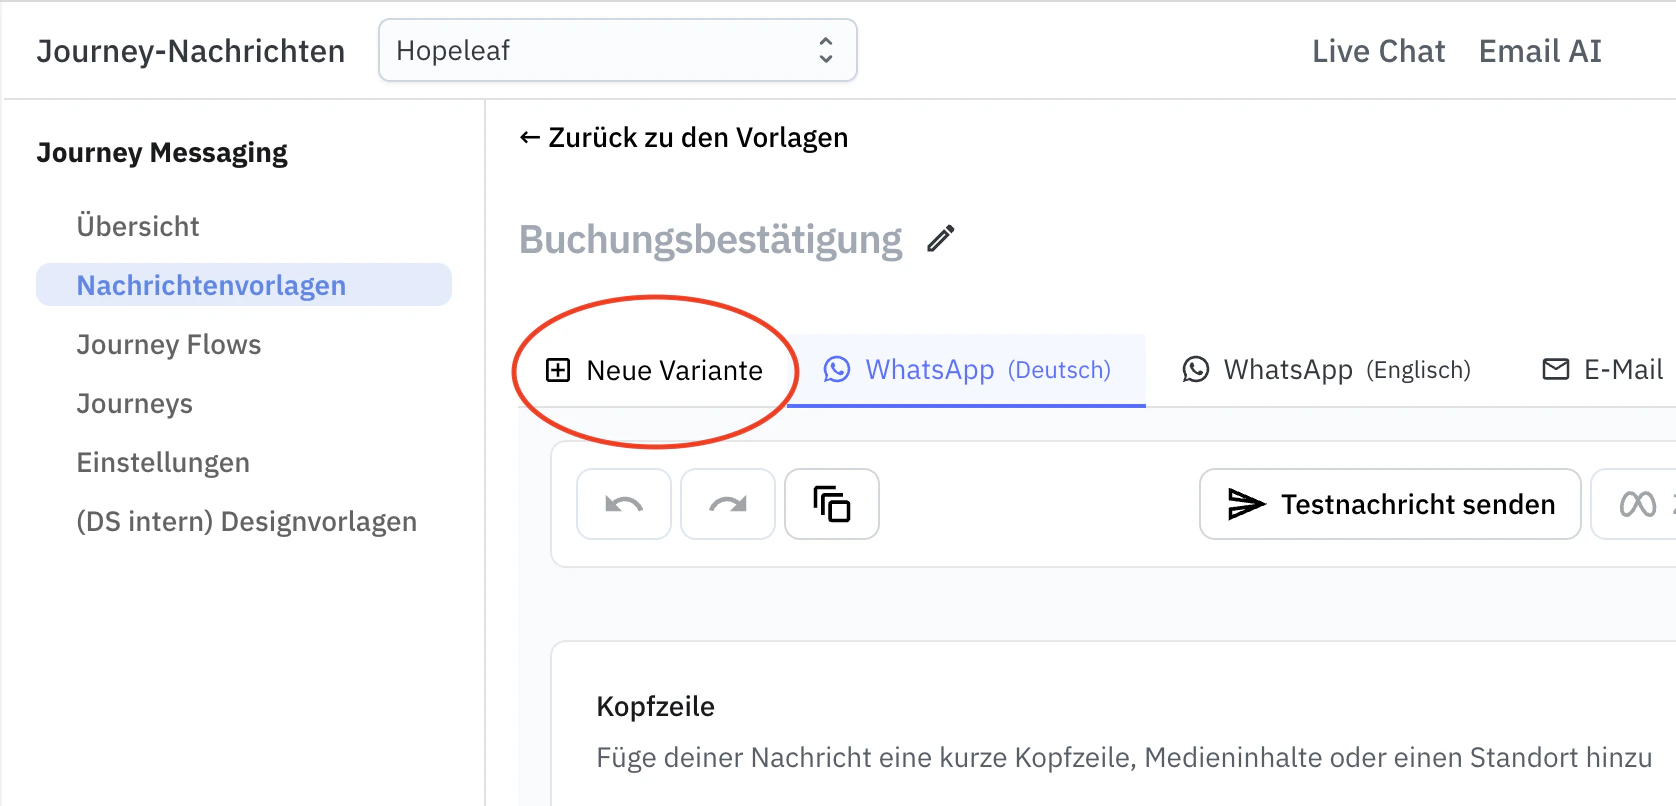 If you want to create a template for a completely new topic, you don't have to start from scratch.
Click here to duplicate an already existing template with all variants, so you can start modifying this template for a new topic.
If you want to create a template for a completely new topic, you don't have to start from scratch.
Click here to duplicate an already existing template with all variants, so you can start modifying this template for a new topic.
 Navigate to Journey Messaging >> Journey Flows
Create a name here and then select the triggering event.
If you want to send a booking confirmation, for example, the triggering event is "Reservation in PMS". With the + sign you can now add various actions to the flow. The main action is of course sending a template that you created earlier. But you can also add delays if you want to send different templates based on the same event.
**Example of a flow:**
1. Guest books room (-> Event "PMS: Reservation")
2. Immediately the "Booking confirmation" template is sent (Preference WhatsApp, Email as fallback)
3. Then Journey Messaging waits 1 day
4. After one day the "Upsell" template is sent (Preference WhatsApp, Email as fallback)
Make sure that Journey Messaging is in "Redirect messages" mode.
Settings >> Journey Messaging
Now wait to see how your guests' bookings are processed by the system. You will only receive the messages in the email box you specified.
When you are satisfied with the result of your configuration, switch the mode to "Active"
Settings >> Journey Messaging
Your guests will now receive the messages.
Navigate to Journey Messaging >> Journey Flows
Create a name here and then select the triggering event.
If you want to send a booking confirmation, for example, the triggering event is "Reservation in PMS". With the + sign you can now add various actions to the flow. The main action is of course sending a template that you created earlier. But you can also add delays if you want to send different templates based on the same event.
**Example of a flow:**
1. Guest books room (-> Event "PMS: Reservation")
2. Immediately the "Booking confirmation" template is sent (Preference WhatsApp, Email as fallback)
3. Then Journey Messaging waits 1 day
4. After one day the "Upsell" template is sent (Preference WhatsApp, Email as fallback)
Make sure that Journey Messaging is in "Redirect messages" mode.
Settings >> Journey Messaging
Now wait to see how your guests' bookings are processed by the system. You will only receive the messages in the email box you specified.
When you are satisfied with the result of your configuration, switch the mode to "Active"
Settings >> Journey Messaging
Your guests will now receive the messages.