> ## Documentation Index
> Fetch the complete documentation index at: https://docs.dialogshift.com/llms.txt
> Use this file to discover all available pages before exploring further.
# Email AI Plugin for Thunderbird
> Use Email AI features directly in Mozilla Thunderbird
Use Email AI functions directly in Mozilla Thunderbird for guest correspondence.
## Installation
Download the file:
Download plugin
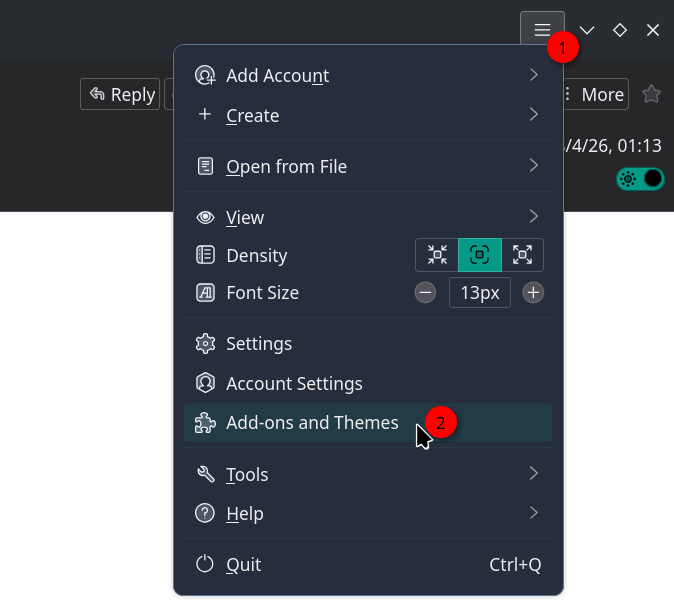
In Thunderbird, open the hamburger menu and select **Add-ons and Themes** (or **Tools → Add-ons and Themes**)
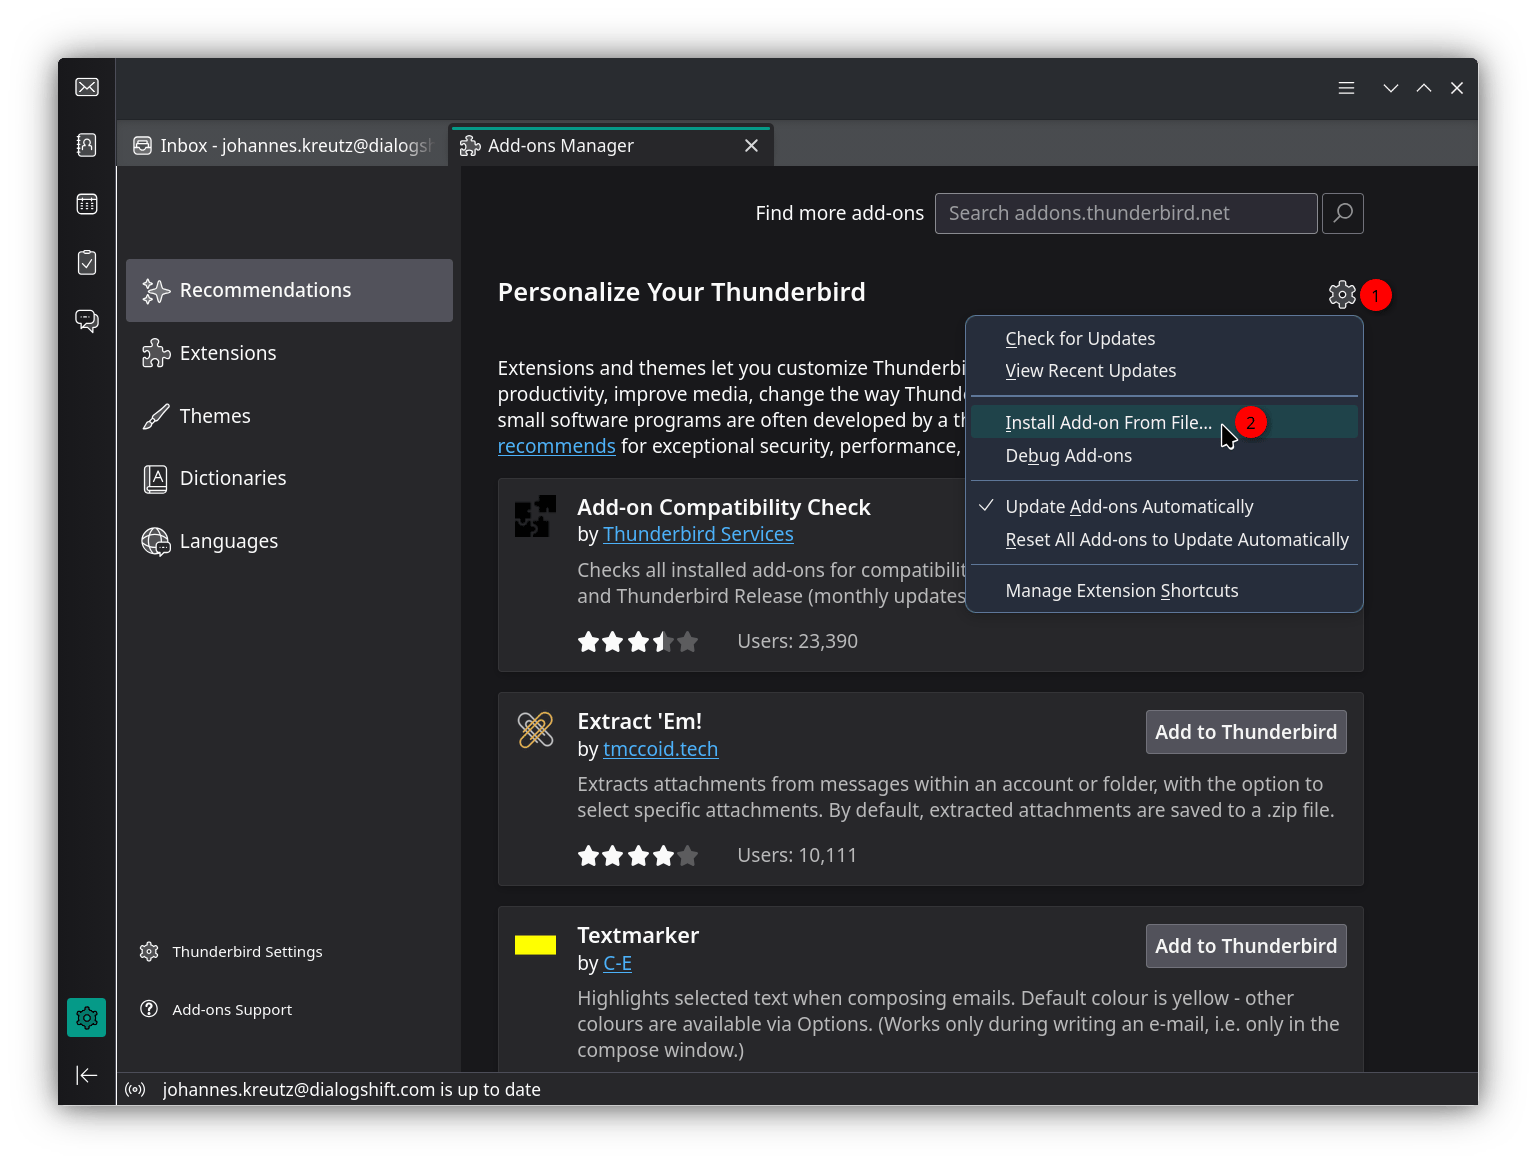
 Click the gear icon next to the search box and select **Install Add-on From File…**, then choose the downloaded `.xpi` file
Alternatively, drag the `.xpi` file directly onto the open Add-ons Manager tab.
Click the gear icon next to the search box and select **Install Add-on From File…**, then choose the downloaded `.xpi` file
Alternatively, drag the `.xpi` file directly onto the open Add-ons Manager tab.
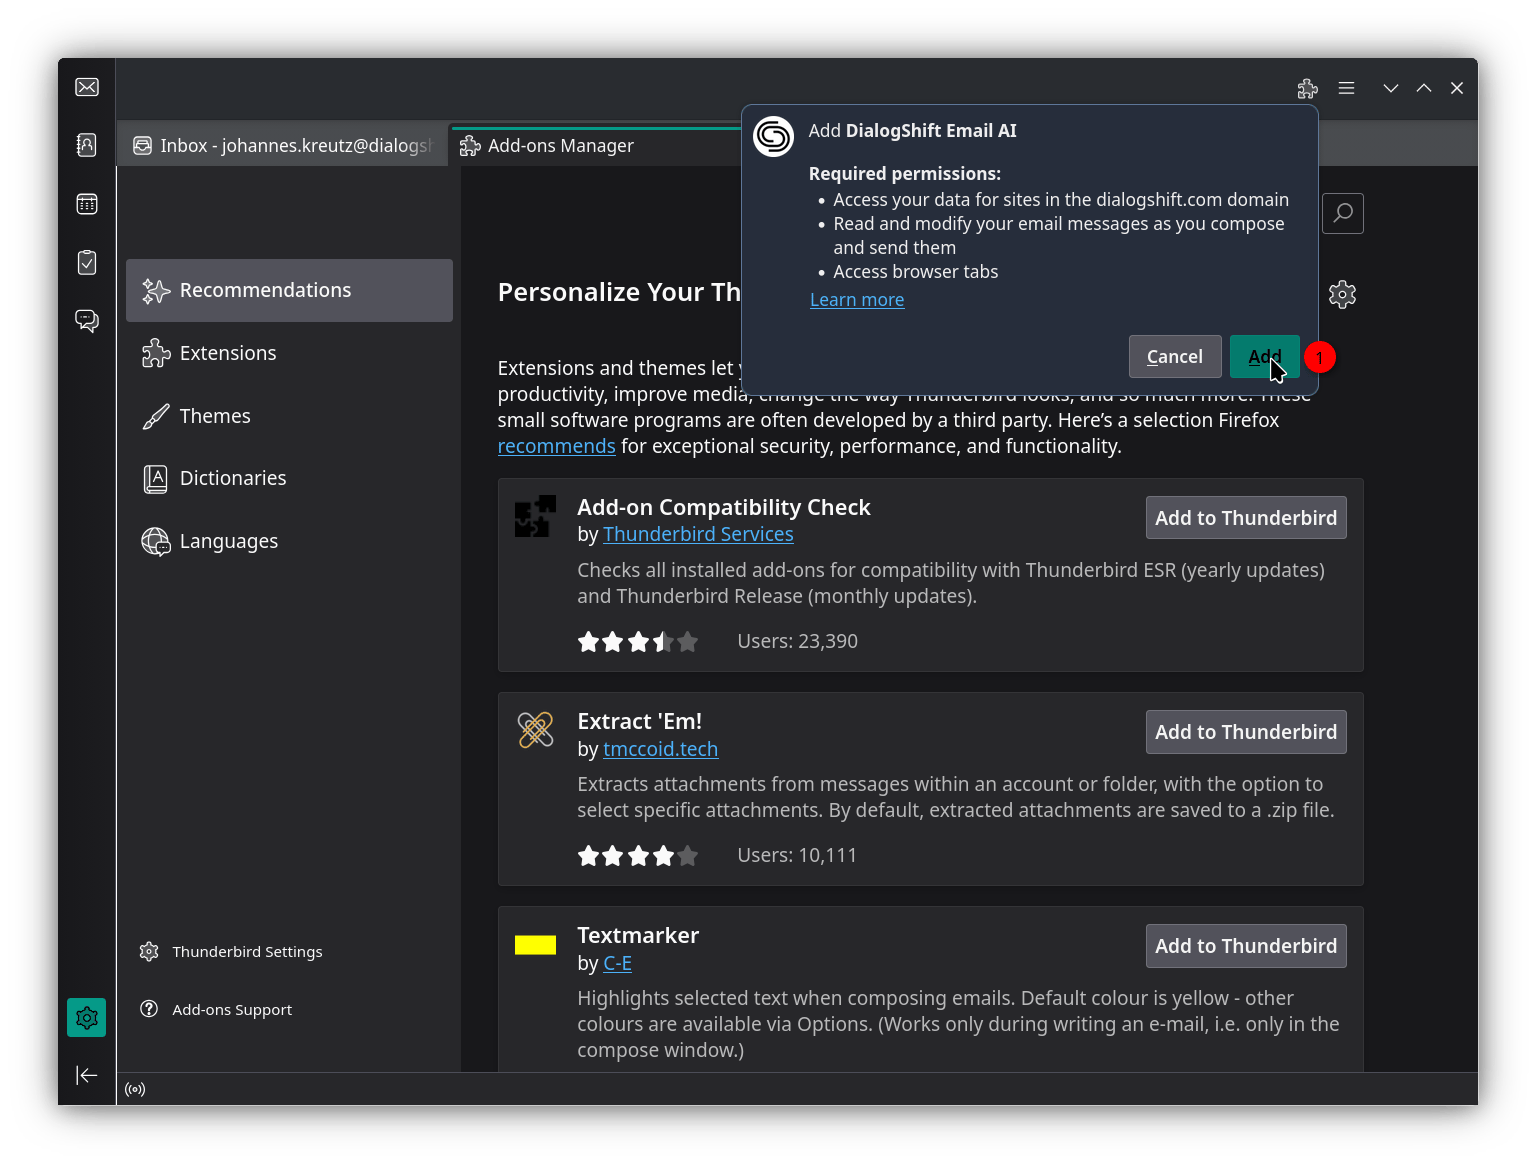
 Thunderbird shows the permissions the plugin requests — access to the dialogshift.com domain, reading and modifying email messages as you compose and send them, and access to browser tabs. Click **Add** to confirm.
 The plugin is active immediately — no restart required.
## Usage
Authenticate with DialogShift login
Click reply on the guest email you want to answer
Create and customize AI response
Insert the generated response into your reply
Use instructions to customize generated responses according to your preferences.
The plugin enables direct use of Email AI functions in Thunderbird.
The plugin is active immediately — no restart required.
## Usage
Authenticate with DialogShift login
Click reply on the guest email you want to answer
Create and customize AI response
Insert the generated response into your reply
Use instructions to customize generated responses according to your preferences.
The plugin enables direct use of Email AI functions in Thunderbird.